
In the previous article, we have discussed what is a telescope and how to buy a decent telescope. If you have not read it yet, I prefer you to read the “Telescopes- part I” article and come to this.
In this article, I am going to discuss how to mount and operate a telescope perfectly.
First, we must know what the mountings for telescopes are.
Telescopes are divided into two major mounting types. They are,
- Altazimuth mounting system, refers the observer’s location, altitude and azimuth to observe the sky
- Equatorial mounting system refers the celestial coordinates
Mounting systems are the types that we have used to operate the telescope. If the mounting system changes, the operating method will also change.
There are two types of alt-azimuth mounts and equatorial mounts.
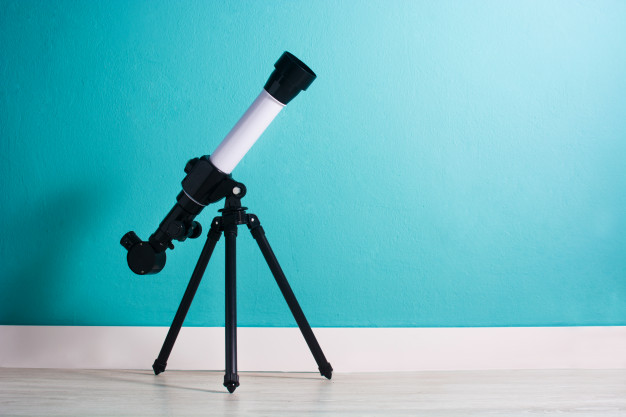
1.Simple Altazimuth mounting system
This is a simple mounting system. These type telescope only has two axil mounts to operate. This is perfect for low power observation, but not good for deep-sky photography.

(Image ref: https://www.opticscentral.com.au/types-of-telescopes-and-mounts.html )
2.Dobsonian Mounting system
This is a new model of Alt-Azimuth mount for beginners. These mounts are grounded by heavy platforms and designed for large Newtonian reflector telescopes.
They are light affordable and great for any beginner.

(Image ref: https://www.opticscentral.com.au/types-of-telescopes-and-mounts.html )
3.German Equatorial mounting System
Equatorial mounts are made to observe the entire night sky and these Telescopes are used to do astrophotography. German mounts use counterweights to properly balance the telescope on what is known as the polar axis. Aiming this axis towards, Polaris aligns the entire mount with Earth’s rotation.

(Image ref: https://www.opticscentral.com.au/types-of-telescopes-and-mounts.html )
4.Fork mounting system.
Fork mounts are used by the telescopes with shorter tubes. These telescopes are balanced by using their center of gravity. So in this mounting system, there is no need for counterweight.
This type of telescopes is tracked by remote.

(Image ref: https://www.opticscentral.com.au/types-of-telescopes-and-mounts.html )
Now we explore how to get ready the telescope to observe.
How to level the tripod?
First, you should adjust the tripod legs match with your height and set the accessory tray to it. New telescopes have a level meter, if not having any level meter, you must bring a level and put it on the tripod and level with the tripod operators.

Then we must fix the mounting system to the tripod. In many alt-azimuth mounting telescopes, they bring the mount with the telescope. Now we have to see the ways of two main mounting systems operate.
How an alt-azimuth mount is gotten ready?

Then we must set the telescope tube to the mount. fix the finder too and put appropriate eyepieces from the eyepiece box.
Now your alt-azimuth telescope is ready to use.
Altitude and Azimuth are the coordinates of the alt-azimuth coordinate system. If we have to make a change in Altitude, we must get the telescope tube up or down. If we have to make a change in Azimuth, we must get the telescope tube right or left.
How an Equatorial mount is gotten ready?
After leveling the tripod and adjust the legs to your height,
1. Place the mount carefully and accurately. Then secure the mount perfectly by tightening the knobs that related to it.

2. if your telescope is tracked by a wired or wireless operator, you must attach the motor drive correctly to the mount. Ensure that the gears of the motor are correctly engaged with those of the mount.
3. Then we must do the polar alignment, which means we must put the 1st tripod leg (the leg labeled as north) and Right Ascension roughly direct to the North celestial pole and adjust the altitude settings the same as to your latitude.


4. Add the counterweights to the slot that have to put those and secure them with the position with the nut

5. Place the telescope tube inside the mounting rings. Use the screws to clamp the rings tight around the tube.

6. If your telescope is an automated tracking telescope, add the driver controller into the mount motor drive. But do not connect to the power supply.
7. Add the fine adjustment cables and tighten with screws. These allow you to make small changes to the RA and declination axes when observing.

8. Fit the desired eyepiece and finder-scope (or red dot finder) onto the telescope and secure with the nuts. Align the finder with the telescope (from the next topic of this article).

9. Loosen the RA axis locking handle and loosen the weights and slide the weights until they balance the telescope. Then secure the nuts at this balanced point.
10. Loosen the declination axis locking handle and loosen the rings that clamp the telescope tube. Then slide the tube until balanced and at that point secure the rings and locking handle.

11. If you are using an automated tracking telescope, now you can power up.

(Image ref: https://www.skyatnightmagazine.com/advice/equatorial-mounts-an-astronomers-guide/ )
- Tube rings – these hold the scope on the mounting plate.
- Tube ring locks – to keep the scope in place.
- Dovetail mounting plate.
- Dec. setting circle.
- RA slow motion control – fine-tunes where the scope is pointing.
- Counterweights.
- Altitude setting – only adjusted once.
Align the finder-scope
During daylight hours, choose an object closer to you and aim the telescope and finderscope to it. Loosen the finder scope’s screws and slide to adjust it with what sees with the telescope. Adjust the finder-scope to aim the object to the middle. (DO NOT DO THIS TELESCOPE AIMED TO THE SUN OR ITS SIDE)
In this article, we have discussed how to be prepared to observe the night sky. If you are interested in Astronomy you can share this with your friends and save this to your knowledge store.
Author- Induwara Bandara
References :
Image references: 1.https://www.skyatnightmagazine.com/advice/equatorial-mounts-an-astronomers-guide/

2. Book- Star and planets by DK publishers.


Great
Thank you ❤